
Appearance
Transferring stock
Updated walkthrough (September 2026)
This guide was rewritten to match the current app. The previous version described a different flow: there is no "Outgoing" transfer type, the receiving store is picked before items are added, and the final action button is labelled Send Stock. If your screen does not match the steps below, update your app or ask your supervisor.
Goal
Move stock from one store to another within your franchise — create an outgoing transfer, accept an incoming transfer, and handle the cases where a transfer is rejected, not received, or saved as a draft.
Where this happens
- In the back office (Core App): Stock Management → Stock Transfer. The Stock Transfer screen has five cards: Send Stock, Receive Stock, Saved Transfers, Transfers Not Received, and Rejected Transfers.
A stock transfer moves items from one store to another within your franchise. This page covers the full lifecycle: creating an outgoing transfer, accepting an incoming transfer, and handling the cases where a transfer is rejected, not received, or saved as a draft.
Problem
You need to move stock from your store to another store — or accept a transfer that is arriving at your store.
Prerequisites
- Sign in to the Core App first — see Login. You land on the dashboard after choosing your store.
- Needs the right user permission. These menu items follow your user's permissions. If the item shows a restriction marker - or clicking it does nothing - your user does not have permission yet. Ask your franchise admin to grant it (see Who can do what (permissions)).
- You are signed in to the store you are transferring from (for outgoing) or to (for incoming).
- Agreement between your store and the other store about what is moving and when.
Steps
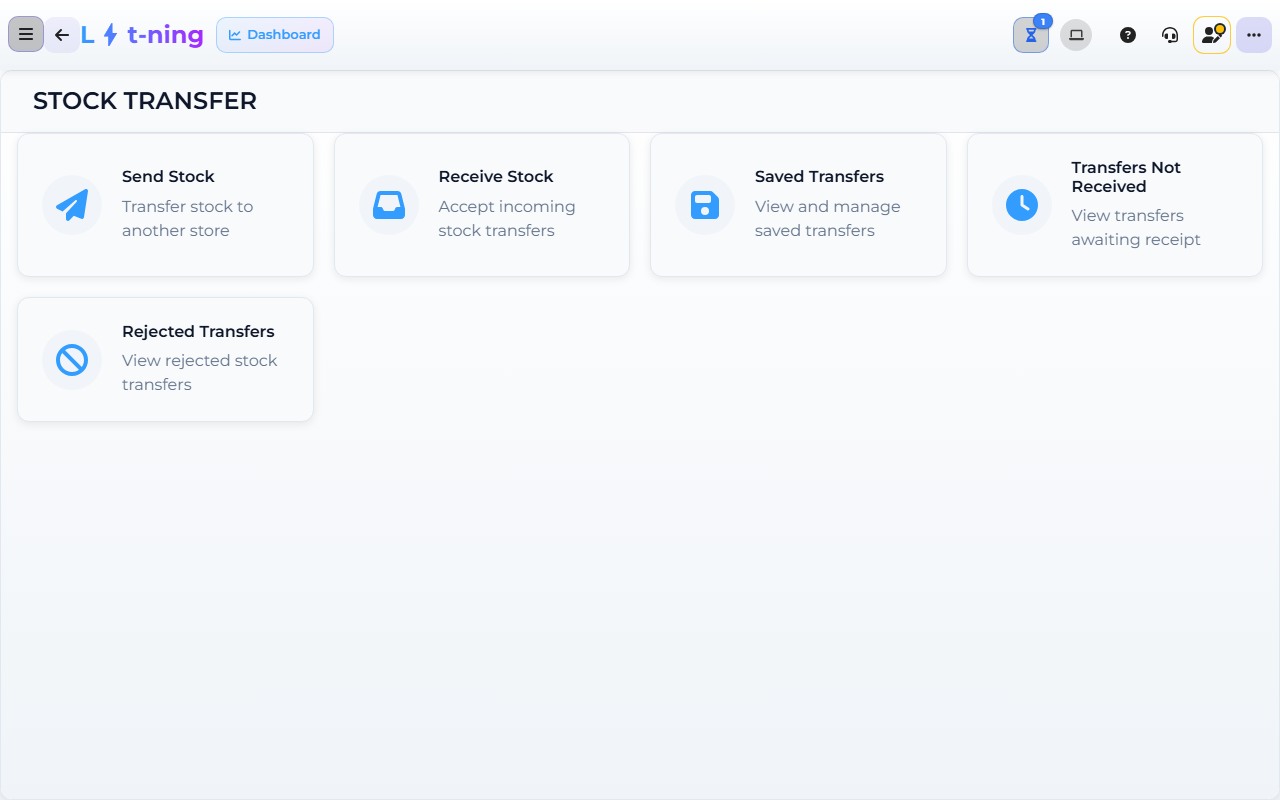
The image shows the Core App Stock Transfer screen. Screens may differ slightly by version.
Outgoing transfer (sending stock)
1. Open Stock Transfer and choose Send Stock
- In the sidebar, expand Stock Management and click Stock Transfer.
- On the Stock Transfer screen, click Send Stock.
2. Pick the receiving store
The Select Receiving Store screen opens.
- Use Search stores to find the destination store (type the store name).
- Click the destination store in the list. Any leftover items from a previous transfer are cleared, and the Items to Send screen opens.
3. Add items to the transfer
The Items to Send screen starts empty. Add items one of these ways:
- Scan it: click the Scan Barcode button, scan or type the item's barcode, check the description and quantities shown, enter the quantity to send, and click SAVE.
- Search for it: click the search button to open the Select Item to Send screen, search by PLU / Stock Code or Item Description, click Search, enter the Send Qty for each line, then click Send Stock to add every line with a quantity to the basket.
- Item is not set up here: click the floating + button to open Add Missing Item, fill in the item details, and click Submit. The item is created and can join the transfer.
On the Items to Send screen you can:
- Tick the checkbox on any line to select it — Delete Selected removes the selected lines.
- Adjust a line's sending quantity — the screen asks for the new quantity and updates the line.
- Watch the total at the bottom — it updates as you change lines.
4. Send the transfer
- Check every line and the total on the Items to Send screen.
- Click Send Stock (the button shows the transfer total).
- Wait for the confirmation — Stock Sent Successfully. A transfer document number is created and the transfer document prints.
- You are returned to the Stock Transfer screen.
Not sending yet? Click Save Transfer, type a description in the Transfer Description ? box, and click Save. The draft is confirmed with Saved Successfully and waits in Saved Transfers.
Incoming transfer (accepting stock)
1. Open the incoming transfer
- In the sidebar, expand Stock Management and click Stock Transfer.
- Click Receive Stock.
- Search for the transfer, then click the transfer card. The Confirm Items screen opens with every line on the transfer.
2. Accept the transfer
- Check each line against what physically arrived.
- Click Accept Transfer.
- Confirm the prompt — Yes, Add to Stock! — the stock is added to your store.
- When asked Do you want to Print GRV?, choose Yes to print a GRV for the delivery, or No to skip. If you print, pick the style — Receipt (For POS Computers) or A4 Document — and choose the printer.
- The screen confirms the transfer was accepted and returns you to the stock screen.
3. Or reject the transfer
- If the delivery is wrong or damaged, click Reject Transfer instead.
- Type the reason when the screen asks for one and confirm. The sender sees the transfer in their Rejected Transfers list.
Expected result
- The sending store's stock levels drop, and a transfer document with a document number is created and printed.
- The receiving store's stock levels rise when the transfer is accepted, with an optional printed GRV.
- Both stores have a matching transfer document number they can quote if anything goes wrong.
- Drafts wait in Saved Transfers; sent-but-not-received transfers appear in Transfers Not Received on the receiving side.
Edge cases
- An item does not exist in the sending store. Click the floating + button on the Items to Send screen and use Add Missing Item to set the item up, then continue.
- You started but did not finish. Click Save Transfer, give it a description, and confirm with Save — Saved Successfully. Resume it later from Saved Transfers.
- A transfer has been sent but never arrived. The receiving store checks the Transfers Not Received list. If it never arrived, the sending store investigates from their side.
- The transfer was rejected by the receiving store. Find it in Rejected Transfers. Open it to review or delete it if it is no longer needed.
- You sent the wrong items or quantities. If the receiving store has not accepted yet, the transfer can be updated from the Transfers Not Received list — the screen asks you to confirm before the edit is saved, and shows Sent Transfer Updated Successfully when it goes through.
- Nothing to send. The search screen warns No Items Selected if you try to send items without entering any quantities — enter a Send Qty of at least 1 for each line first.