
Appearance
Customers
Goal
Add a new account customer, update an existing one, or pull up invoices and payment records.
Where this happens
- In the back office (Core App): Customer Management group (top-level) — debtors, quotes, layby, loyalty. Customer Service (shortcut group) — Create / Edit Customer, View Invoices.
Customer management covers the people who buy from you on account — sometimes called debtors. This page covers creating, editing, and looking up customer accounts, and working with quotes, invoices, and layby (older notes spell this "lay-by" or "lay by"; the in-app label is Layby).
Problem
You need to add a new account customer, update an existing one, or pull up invoices and payment records.
Prerequisites
- Signed in to your store
- Permission to use the Customer Management screens
- For new customers: their name, phone, and TPIN (Tax Payer Identification Number) when available
Steps
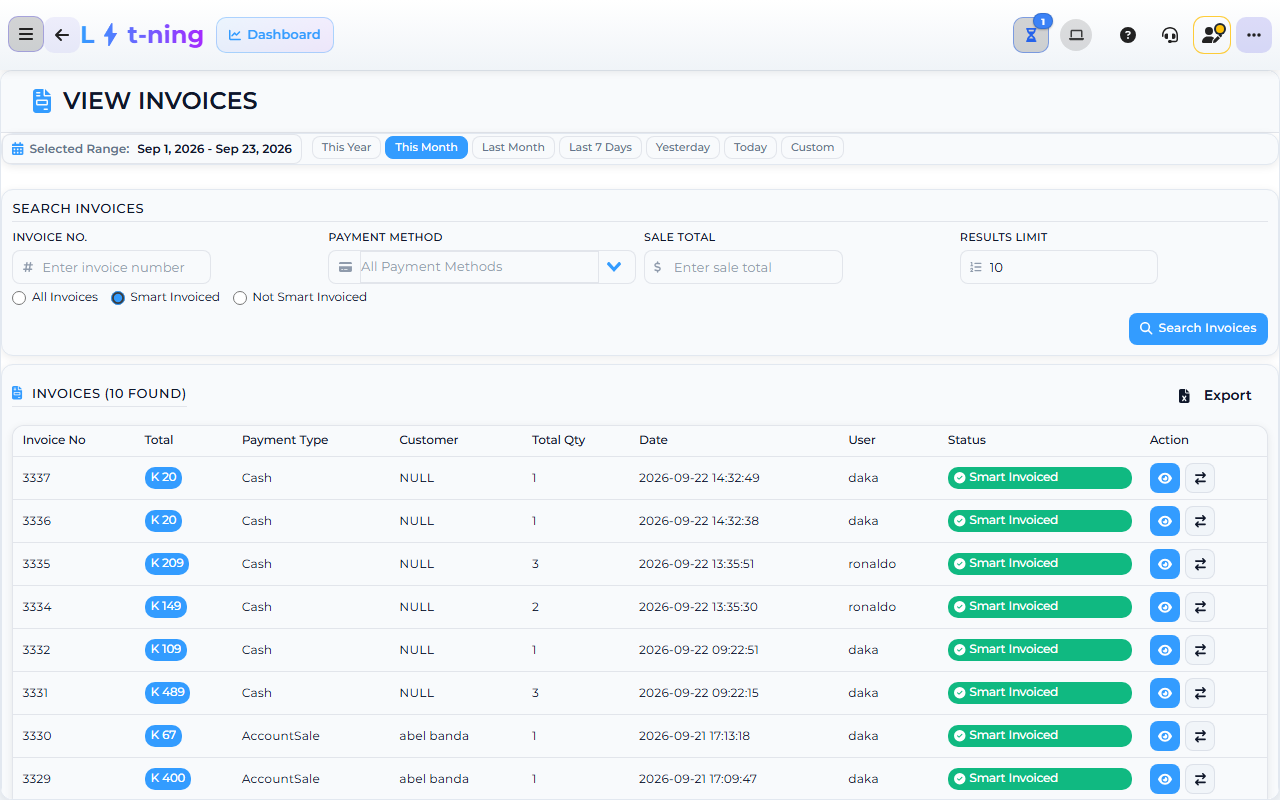
The image shows the Core App View Invoices (Customer Management) screen. Screens may differ slightly by version.
Create an account customer
1. Open the Create Customer screen
- In the sidebar, expand Customer Management.
- Click Create Account Customer.
2. Enter the customer's details
Fill in the basic information first:
| Field | What to enter |
|---|---|
| First Name or Business Name | Required |
| Surname | Optional |
Then fill in the contact and business details:
| Field | What to enter |
|---|---|
| Phone | Country code + number (for example, +260…) |
| Optional | |
| Currency | Defaults to Kwacha for Zambian stores |
| TPIN | Required. Tax Payer Identification Number — use Verify TPIN to check it with ZRA |
| Discount Type | Normal / No Discount, Price 1–5, From Cost, or From Selling |
| Address, Area, City | As on file |
3. Pick the right options for this customer
Tick any of these if they apply:
- Use ZRA Details — pull tax information from the Zambia Revenue Authority for this customer.
- Cash Customer — flag this account for cash sales only.
- Create Across Entire Franchise — make the customer available at every store in your franchise, not just yours.
4. Save
Click Save. The new customer appears in search results immediately.
Edit an existing customer
- In the sidebar, expand Customer Management.
- Click Edit Account Customer.
- Search by name, contact number, or TPIN.
- Click the customer in the results.
- Change any field.
- Click Save.
Look up invoices and quotes
| To see… | Open this screen |
|---|---|
| Invoices for a customer | View Invoices → filter by customer or date |
| Quotes for a customer | View Quotes → search by customer |
| Payment records | Proof-Of-Payment → upload receipts, match to invoices |
| Delivery notes | Delivery Notes → manage and print |
| Layby agreements | Layby Customers → track payments and releases |
Manage franchise-wide accounts
If your franchise has a single set of debtors that all stores share, use Franchise / Main Debtors from the Customer Management menu.
Expected result
- New customers are searchable by name, contact number, or TPIN immediately after Save.
- Edits appear the next time you open the customer record.
- Quotes convert to invoices with one click from the View Quotes screen.
Edge cases
- "Customer already exists" when you try to save. Search for the name first. If they are already there, edit the existing record instead of creating a duplicate.
- TPIN validation fails. Double-check the number with the customer and use Verify TPIN on the form. The TPIN field is required on the create screen — if you do not have a valid number yet, ask your supervisor before saving.
- A customer needs to be available at every store. Tick Create Across Entire Franchise before saving.
- You cannot find a customer in search. Try searching by phone number instead of name. If still missing, the customer may belong to a different store in your franchise — use Franchise / Main Debtors.
- A quote needs to become an invoice. Open the quote from View Quotes and click Convert to Invoice.