
Appearance
Receiving stock (GRV)
Goal
Record a supplier delivery in Lyt-ning so the stock is counted, the cost is captured, and your accounts team has a GRV number to pay against.
Where this happens
- In the back office (Core App): Stock Management → Receive Stock / GRV (or Receive Stock under Daily Operations). Tills do not create GRVs — they use Stock Transfer only.
A GRV (Goods Received Voucher) is the record you create when a delivery arrives from a supplier. It is how stock enters your store's inventory and how your accounts know what to pay.
Problem
A supplier delivery has arrived and you need to record it in Lyt-ning so the stock is counted and the cost is captured.
Prerequisites
- Sign in to the Core App first — see Login. You land on the dashboard after choosing your store. Needs the right user permission. These menu items follow your user's permissions. If the item shows a restriction marker - or clicking it does nothing - your user does not have permission yet. Ask your franchise admin to grant it (see Who can do what (permissions)).
- Signed in to your store
- Permission to use the Receive Stock screen
- The delivery note or supplier invoice at hand
- The supplier set up in Lyt-ning (ask your supervisor if it is not)
Steps
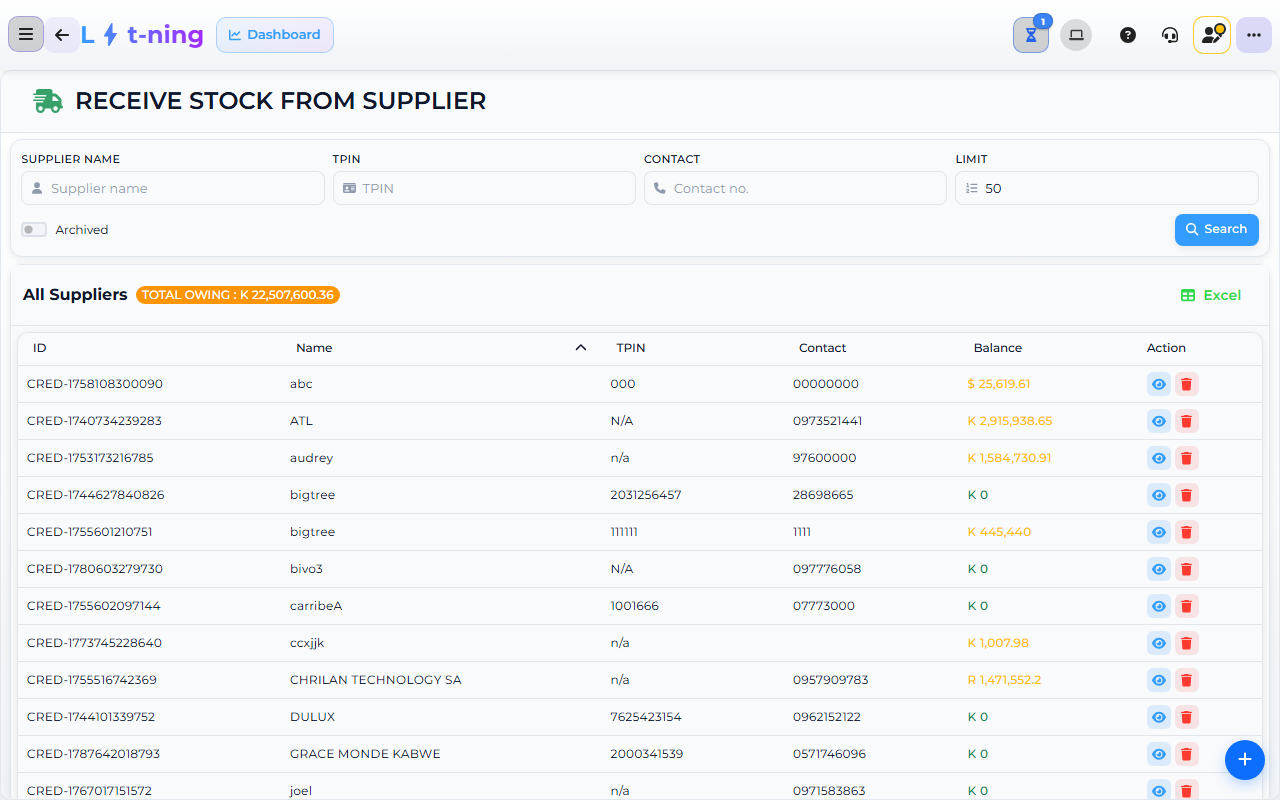
The image shows the Core App Receive Stock / GRV screen. Screens may differ slightly by version.
1. Open the Receive Stock screen
- In the sidebar, expand Stock Management.
- Click Receive Stock / GRV.
You can also reach the same screen from the dashboard shortcut Receive.
2. Pick the supplier
- Click the Supplier dropdown.
- Start typing the supplier name.
- Pick the supplier from the list.
If the supplier is not in the list, stop and ask your supervisor to add the supplier before you continue.
3. Add items to the delivery
For each item on the delivery note:
- Switch on Scan Barcode and scan the item's barcode — or search for the item by description, or type the PLU / stock code in the PLU / Barcode field and press Enter.
- Enter the quantity received (the actual count, not the quantity on the delivery note).
- Enter the cost the supplier charged for this line.
- Repeat for each item on the delivery.
If the system cannot find the stock code, see Edge cases below.
4. Attach the delivery note (optional but recommended)
After you save, the GRV header shows a Documents button — click it and attach the supplier delivery note or invoice. (The button appears once the GRV has a number, so attach after saving; you can also add documents later from the saved GRV.) This keeps the paper trail in one place.
5. Save the GRV
- Review the totals at the bottom of the screen.
- Click Save (or follow your franchise's save flow — the button name varies).
- Wait for the confirmation message that includes the GRV number.
Write the GRV number on the delivery note before you file it. Your accounts team will ask for it.
Expected result
- The stock you received now appears in the inventory for each item.
- The Received value on the dashboard increases.
- You have a GRV number you can quote to accounts and Support.
Edge cases
- The barcode does not find an item. Search by description instead. If still nothing, the item may not exist in your store yet — create the item from Stock management or ask your supervisor.
- The quantity does not match the delivery note. Record the actual quantity received, not the quantity on the note. Make a note of the difference on the delivery note and tell your supervisor.
- You need to change a line after saving. Open the GRV again to edit the items received — from Central GRV Management, from the supplier's record (its GRV section), or from the purchase order it came from. Stock levels update automatically.
- You saved a GRV as a draft and want to finish it. Resume it from the supplier's GRV section or from Central GRV Management, then complete and save it as normal.
- You need to check a transfer that was sent or received. Open Stock Management → Stock Transfer → Saved Transfers to see transfers that were saved but not yet completed, and Rejected Transfers to see any your store sent back or that another store returned to you.
- The supplier on the delivery note is different from the one set up in Lyt-ning. Stop and ask your supervisor to add the correct supplier before saving.
Related
Central GRV Management (multi-store franchises)
For franchises with multiple stores, Stock Management → Central GRV Management is the central control point for inbound stock: the All Supplier GRVs screen lists the GRVs raised across your stores so HQ can review, finish, pay for, or return them.
Use it when you are the franchise HQ reviewer (or when you are a store supervisor who needs to see the franchise-wide GRV status).
- Open Stock Management → Central GRV Management. The All Supplier GRVs screen opens.
- Use the search field (GRV number, invoice, supplier, or user) and the pending / processed groupings to find the GRV.
- Each row shows the GRV No., Invoice / Ref, Supplier, Date, User, Amount, and Status.
- Use the row actions:
- View Supplier — open the supplier's record.
- Print — print the GRV.
- Process — resume a saved GRV and finish receiving its items.
- Pay — open the Make GRV Payment box, enter the payment reason and account, then confirm the payment.
- Return — send the GRV back so the store can correct it; confirm the return to post it.
Notes:
- Central GRV Management is only available to users with the permission for it — ask your franchise admin to grant it if the menu item is missing.
- A returned GRV goes back to the store; the store corrects the lines and saves it again.